FlyKnight's
EFFECTS
I recently released my first game, FlyKnight, and one of the things people have been enjoying is the little funky spell effects it has. I had a lot of fun making them and it's a rather easy process so I wanted to go through it and show y'all.
But why would you want to do this in the first place? Depending on the use case you might not need or want to do it but here is what I think:
PROS
- Looks cool and funky
- It's like a particle effect but in 3D space, looks good from any angle
- No need to use bones, which are a hassle to set up and resource-intensive
- More control over movement of individual vertices
CONS
- Models with a lot of vertices can create really large and unwieldy files
- Contains no data that the engine can use for collision/hitbox
- Some engines might not be able to handle well alembic files
TOOLS
For this endeavour we will be using the almighty blender, savior of 3D editing software. And a little plugin called AnimAll which allows us
to save vertex data on a keyframe to be able to animate things without bones.
I recommend looking into a tutorial about AnimAll, I will walk you through my process but it's going to help you to know the ins and
outs of it.
In this example I'll start with this model of roots, I'll be showing the spell from the 3rd video in which roots come out of the ground.
We want the roots to come out doing a swirl, to give them personality, so I made a curve/spline that they will follow:
With the Curve modifier we can make our model follow the spline. Notice that in this case the roots are "textured", actually they are just
using vertex colors, but you can use any sort of model with your shading style of choice.
Now, to convey that the roots are rising from the ground we
need to animate them, and we will animate both the root and the spline, first we start with the simple stuff, for the root to come out
following the spline and have some pizzazz, I just raise it on the Z axis and also rotate it while it does so. Notice how it already
looks quite cool just following the spline we made:
And now we can combine this with the AnimAll plugin to also straighten the spline and add a stabbing motion to this roots model:
Using the AnimAll plugin is easy, we just need to select the points in our spline, then check Points, click Insert to create a keyframe,
and then we move to a new keyframe, set our points in a new position and "Insert" a new keyframe, if we get back from editing mode we can see
the result in action:
Finally we select the model and export it as Alembic, once brought into Unreal or your engine of choice it's likely that the
scale will be all wrong and you need to scale it up by 100 or something like that. These are the export/import settings I use from Blender
to Unreal:
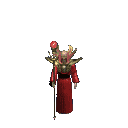
EXAMPLES
Here are some other examples, I will not go into detail but several of these have models that grow and shrink in size while having a uniform polycount, this can all be achieved with the AnimAll plugin + the remesh modifier. The problem with the remesh modifier is that it deletes vertex painting information so you'll need to set the colors through shaders in-engine. Another problem it has is that if the engine detects that your model has 0 vertices at some point, it might not import it at all! So you always need to have a little bit of model at all times.
Bye bye!
That's gonna be it for this one, hope you found it inspiring and cool, it really is a very easy and fun process that can spice up things. Peace!